

 24/7 Emergency Service
Post Water Leak Disinfection Process
11/3/2022 (Permalink)
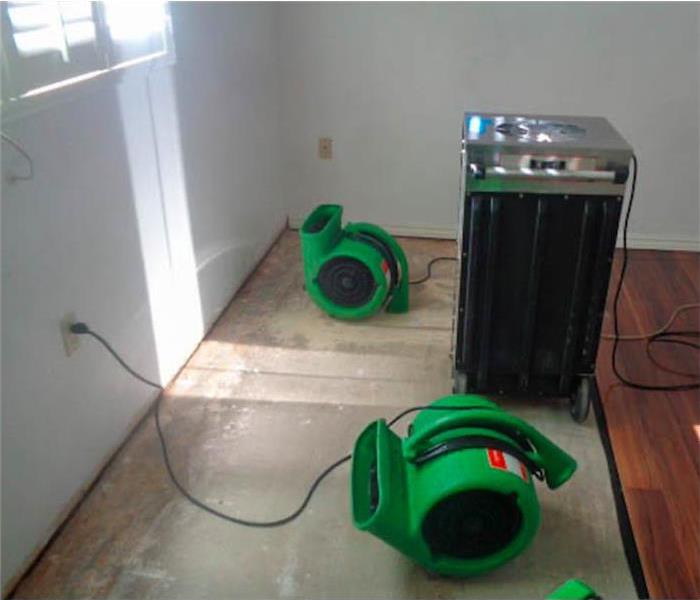 Use fans and dehumidifiers to dry the area quickly, and do not allow standing water to remain in the area.
Post Water Leak Disinfection Process
Water leak disinfection is an important first step in the restoration process. It's also a critical part of preventing mold and other contamination from ruining your home or business. Here's what you need to know…
Removing soaked materials.
It is not just about getting the water out of your home; it's also about making sure you eliminate any bacteria or mold that might be present and keep your family safe. The best way to do this is by using antimicrobial products. They contain all-natural ingredients that kill germs, viruses, and other harmful microbes without leaving behind any toxic residue that could harm people or pets.
The first thing you should do after a leak is clear away furniture and belongings affected by water damage, so they don't encounter any contaminants. You should also turn off the electricity at the main breaker box before removing wet carpeting or insulation. Afterward, remove as much moisture from walls as possible using fans set on high speed—this will cut down on drying times later by reducing moisture levels in potentially damaged areas where mold can grow.
Drying out the structure.
The first step in the post-water leak disinfection process is to dry out the area. Use fans and dehumidifiers to dry the area quickly, and do not allow standing water to remain in the area. If you leave standing water in an area that has experienced a flood or other type of water damage, then mold spores can grow and spread throughout your home.
Then spray affected areas with antimicrobial.
Then spray the affected areas with an antimicrobial. Let it sit for a few minutes before wiping it off with water and drying it with a towel. Repeat if necessary.
This step is crucial to keep mold from growing back, especially if you have a large area of mold-affected drywall that needs cleaning up.
You see, drying is an important part of disinfection. Antimicrobial products need to be able to penetrate through the surface of your moldy sheetrock or flooring and kill any bacteria that have been growing beneath it. But if the area isn't completely dry before application (which may take days or weeks depending on how big the leak was) then water will get in between these layers and prevent the antimicrobial from doing its job properly.
Here's a procedure for a common first restoration task
- Dry the area out completely: Use a fan or dehumidifier to dry the affected area as much as possible before applying antimicrobial spray. This will help prevent mold growth and avoid having to deal with additional water damage later.
- Spray affected areas with antimicrobial spray: If you have any remaining mold, use an antimicrobial spray like Lysol or Clorox Clean-Up in conjunction with your existing cleanup efforts to disinfect each part of the room (and its contents) that was affected by water leakage during your home's leak detection process. We recommend using these sprays because they're easy to apply, non-toxic and effective at killing harmful bacteria.
- Let it air dry: Allow everything affected by water leakage during your home's leak detection process to dry completely before starting repairs (i.e., painting over mildewed areas).
Following these simple steps, you can not only restore your home to livable condition but actually prevent further problems!